Saturday, August 24, 2013

Before and After!

Bit by bit we are making our house more our home! We still have about 100 things on our to do list, but everything was put on halt when we had to replaced our central air.. eeep. I wanted to share all of the things we have done so far! :)

Our biggest project yet...
Kitchen... BEFORE!


The Kitchen.. AFTER!

 
So much has been done, but all that is left is to replace the fridge! The rest of the appliances have been replaced. The floor has new tile. New countertops. The old vinyl backsplash was ripped out and tiled with stone and accent pieces. Quarter round trim was added to the base trim to give it more of a dimensional look. The cabinets have been moved up a FOOT to give us more space. They have also been refinished and new hardware added. The old trim at the top of the cabinets has been removed and crown has been added! I am so in love with my kitchen!

Next was one of our other big projects.. Roey's playroom. I don't have complete shots since everything has been finished, so I will have to update even more later.

BEFORE....
 
Playroom AFTER!


Since Rosalie's playroom is actually the master bedroom of the house, she also has a walk in closet.

BEFORE...

AFTER!
 
 
Kevin's Mancave. We started it.. but it's not anywhere close to being finished!
 
Before... this was literally the morning we moved in..
In Progress...
 
The Mancave bathroom before..
And After!
 
 
Rosalie's Closet.. The shelves that were in there when we moved in were nice... but it was hard to hang her clothes in front.. everything was mostly behind the doors.
 
Before...
 
 
After!
We did the same thing to our closet.. except the walls are painted dark brown and the organizers are all solid brown!
 
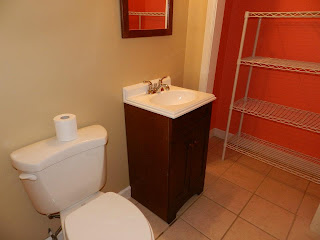
We have temporarily flipped the downstairs bathroom. We eventually want to replace EVERYTHING.. but to make it a bit prettier until then..
 
Before...
 
 
After!


The last project.. our pool. Sigh, as much as we LOVED our pool, the deck was in bad shape.. and the pool itself was rusted at the bottom. Even with a brand new liner, the rust  spots were rubbing it putting in little holes, causing water to leak. We constantly had to add water and the walls felt weak, so we felt it was best to take it down. I'm sure in a few years we will get another.. but not nearly as big since there are just the three of us!
 
Before..
 
After!
We used the level ground and covered it with rubber mulch and made a play area! We moved the trampoline where the deck was because it had completely killed the grass where it was before. On another note, that dead grass area is now all pretty :)

Friday, August 23, 2013

Are you slowly killing your sweet furbaby?

Let me start by introducing my sweet furbabies.
 
The baby of the three... but now the largest of them all.. Sweet Miss Sadie.
 The first furry addition to the Hollis family... Buddy.. AKA Budders.
 And our Alabama rescue dog.. Marmaduke.. AKA Duke. Duke came to us at merely 6 weeks old.. extremely sick. He was saved by a local rescue that found Duke and his brothers and sisters abandoned in some hedges by an apartment complex. Now look at the handsome young guy! He is filled with so much life and love!
 
Now... lets talk about the purpose of you meeting my furry children. Budders came to us when he was one. When he came to us, his previous owner had told us that the military vet said he had dry skin, but she thought it was something more. We decided to get a second opinion and took him to a local vet in Italy where he diagnosed him with allergies. The allergies were controlled with prednisone, which is a steroid. We didn't have to give them to him on a regular basis, but just as needed. Upon moving to Alabama, his allergies spiraled out of control. We became desperate and tried everything. He got no relief. Our options were to let him dig his legs raw, or keep him on steroids daily and slowly let them destroy his vital organs. I felt hopeless. His allergies are seasonal, not food related, so we were at a loss.
 
I began researching. With google at my fingertips, I learned some new insight. I learned that allergies in dogs can be caused by their diet. This does not mean they are allergic to what is in the food, but rather their body is lacking something in their diet from the food they are eating thus causing the allergies. I thought surely this fix cannot be that simple. Dry dog food is cooked at such a high temperature that any nutrients in the food is cooked out. Chicken in dog food can also make those allergies worse. Omega acids are key to helping skin conditions in pets. I began a hunt to find a dog food that had no chicken, added Omega acids, and was preferably raw meat.  My researching went even further after reading that. I needed to know what I needed in my furry kids' diet.
 
This is why I'm here. I feel as though I NEED to share with everyone what I have found. We give our kids kibbles n bits. It's not cheap, but it's not the $100 food. I always assumed it was a good, hearty food. WRONG. Completely freaken wrong Mandee. After the knowledge I have found, I feel as though CPS for dogs should come take my furry kids away cause I have been a terrible mom for not educating myself! lol!
 
One of the major fillers in dry dog food is corn.  Not the sweet corn we eat... but feed corn. It may not even be complete feed corn.. but rather corn dust! This corn could be completely contaminated with pesticides or is corn that was condemned for human consumption.
 
Next you may see a lot of "by-products". Or it may just read "animal meat". I never understood what the term meant. I'm so glad I know now. By-products in dog food are basically the leftover parts after animals have been slaughtered and then some. This can be ANYTHING.. feathers.. hooves..heads.. but by-products go further than that. Other things used for by-products are ROADKILL, euthanized cattle, spoiled grocery meat, diseased and dying livestock, dead zoo animals, restaurant grease, and the list goes on. Dead pets are often thrown right into the grinder with their flea collars still intact. Cattle will still have ID tags on. Even the green waste bags from vets that contain the euthanized pets all get thrown right into the grinder and get processed into the foods you are feeding your sweet furbaby.
 
Not grossed out yet? So your dog food says it has grain in it. That's healthy, right? WRONG. They are not getting the healthy grains we get.. but usually it's just the SWEEPINGS off of the floors of mills!
 
If this stuff is "unfit for human consumption", then why can it be given to our "children"?  If you are like me, right now you are feeling blown away, misled, and deceived into thinking you have been feeding your pup properly. After work today, I went to the gym and then went straight to Pet Smart and picked up a bag of Blue Buffalo. Upon doing my research, it is one of the best. They have NO BY-PRODUCTS, NO "GRAIN",  NO ARTIFICIAL FLAVORS! Blue Buffalo is all natural and has added omega acids! The meat in Blue Buffalo is REAL meat! After these findings, I informed Kevin that nothing will come into our house without me reading the label now that I have the knowledge of what our pups are eating. All of the treats in our house have been replaced with Blue Buffalo too.
 
I hope everyone now has some insight as to what your dog is ingesting. If the ingredients in your pets food say by-product, animal meat, or grain, then you are basically feeding your pup McDonalds every day for their entire life. Would you go out on the road and pick up a week old, diseased and decaying deer infested with maggots and put it in your pup's dish? Of course not!

Thursday, August 1, 2013

news to share!

I have some exciting news to share! Some of you may know... some may only know bits and pieces.. but here's the whole story.

A year ago, I began seeing a new doctor upon arriving here in Alabama. Upon going through my medical chart I brought from Aviano, he discovered some shocking results. I had tests results, one after another, that revealed abnormal results. That was all I was ever told. I was told they were abnormal, but nothing to be concerned about and nothing needed done. The doctor said every test was more abnormal than the one before. He wanted to run some tests himself and see what my current status was. Since my doctor of three years made it sound like no big deal, I shrugged it off. This all started in August. By the first week of December, I received a call from my doctor's nurse, asking me to come in for a consult the next day. She said my test came back abnormal. Big shocker *insert sarcasm*.

 But then she dropped the bomb. She said I needed surgery. Puzzled, I asked her why. She informed me that my test wasn't just abnormal, but rather I had tested to have precancerous cells. A large amount of precancerous cells. In 4 years, the cells had really progressed. 2 weeks later, I was in surgery. He removed all of the cells in hopes that healthy new cells would return in their place.

Fast forward to 3 weeks ago. I went back to get re-tested. While talking with the doctor, I asked what would happen next. He said he had high hopes that all healthy cells would have replaced the precancerous cells. If that was the case, in 6 months I would just have to come back and get re-tested. He said if they came back abnormal again, it would be a different story. He said in most cases that come back abnormal a second time, he can perform the surgery again. Most come back normal after the 2nd surgery. He said in my case, it was so severe and he had to remove too much tissue that a second surgery would not be an option this soon. He said in my case, he got clear margins and the test from the surgery proved that he got it all. If it came back abnormal again, it was cause for concern because that meant that precancerous cells were coming back and weren't just ones that were missed from the surgery. He then informed me that in the case of it coming back abnormal, I would have to go to an oncologist. How does a healthy 27 year old comprehend the word oncologist? I could not wrap my brain around it.

Fast forward to today. I came home from work, utterly exhausted. I worked later than normal and had to get groceries afterward. As I come into the house, Kevin says he has something to tell me. When I walk upstairs ready to collapse of exhaustion, he hands me a letter. A letter stating my test came back NORMAL!!!!!!!!!!!!!!!!! Precancerous cells are gone!!!! A year we have dealt with this. I'm so ready for our lives to get back to normal and not spend weekly/biweekly/monthly visits at the doctor! I'm pretty sure I should own part of Trinity Hospital in the amount of money Tricare has invested in me and the amount of money I've paid for that dang parking garage!

Monday, June 3, 2013

The Hollis family GREW.. AGAIN!

If I could fill my house with dogs..I would in a heartbeat! Those that say diamonds are a girl's bestfriend, CLEARLY never owned a dog! I have always wanted a husky in the worst way. When we moved to Italy we planned on adopting one, but then we adopted Budders. When we got to Alabama we planned on adopting one yet again, but then we got Duke. lol. I couldn't bring myself to pay for a bred dog, when I knew that sick little rescue dog needed a home.
 
Then Mother's Day and my birthday rolled around. I was sitting in the kitchen with my husband and BFF. Kevin asked me what I wanted for both holidays. I told him a husky and I would be content. Him and my friend looked at me like I was nuts. He said if I could find one within a certain driving distance for x amount of money, then I could get one. Well, I did it. She was only a few days old when I found the breeder and for 6 weeks we watched the little Princess grow and could not wait for her to join our furever family!
 
So I would like you to meet.. Miss Sadie!
She is the sweetest little girl! It's unbelievable that only 7 1/2 weeks how much her personality has developed. She is unlike most female huskys. Most females are very independent. Not Miss Sadie. She has to be with someone at all times. For her first week here, she would wake up in the middle of the night crying and one of us would have to sleep on the floor by her kennel in order for her to sleep through the night. Yes, she is like a newborn. lol. Now Duke sleeps beside her kennel and keeps her company throughout the night. When she is fully pottytrained and out of this puppy chewing stage, she can upgrade to the bed.. but she's sooo bad now! She's so full of life and energy.
 Sweet puppy kisses :-)
 The rough life of a Princess Puppy


Isn't she just absolutely precious! She fits right into our little family! When she was born she looked black.. but most of her black has faded to gray and one of her eyes changed from blue to brown so she will be part of the bi-eyed club! She still does not have a full name and we need to come up with one soon so we can get her AKC registered!

Father's Day Idea!

My Dad and FIL are the HARDEST people to buy for when it comes to any holiday. My Dad likes things with meaning... my FIL, likes giftcards. Those that know me, know that I don't like doing giftcards. They just seem so impersonal and I feel like there is no thought to them. I like people to think "Dang, she put some serious thought into that!".. but it seems as the years go on, I'm running out of ideas.
 
Last year I took two Pinterest ideas and combined them into one for my husband... this was our result:
 
This year I took a spin off this for my Dad and my FIL.

 
I managed to recycle the letters from last year... bought a W, E, and the heart. Picked up some red spray paint for the heart and recycled the blue paint from last year.
 
I then bought these cute frames from Michaels. This isn't the picture of my frames.. I painted mine black.. but I haven't uploaded a pic yet so I found the exact frames online

 
They look JUST like Organic Bloom.... but you want to know what is awesome??? I only paid $8.99!!!!
 
Once I get the pictures printed and in frames, I will be posting!!! Just a little behind on Father's Day presents this year!

Thursday, April 25, 2013

Holiday Craft and Gift Ideas!

Back in October I came across this adorable Halloween plate on Pinterest. I didn't have high hopes on how it would turn out... everything always looks better on Pinterest... but it turned out ADORABLE. Since then, I rack my brain every holiday and try to come out with something new with the same concept. I've had sooo many people ask me how I made it, what I used, ect. After typing it out 100 times, I've decided to just blog it!
 
This was our first project.. the Halloween plate.
Here's my directions!

What you need:
  • A porcelain or glass plate. My FAVORITE is a cheapy $4.99 target porcelain plate with scalloped edges. If you using glass, MAKE SURE it is oven SAFE!
  • Paint. My preference is Martha Stewart all surface paint. I believe it's only $1.99 for a tube at Michaels.
  • Fine point brushes. Again, my favorites can be purchased at Michaels. Anywhere between $4-8
  • Stencils. I found mine at Michaels.
  • Wide brushes. My brushes I use are from Michaels and are $7.99. You want the softest brushes you can find so they won't leave streaks! I use medium soft (they are the softest our michaels has), and they do leave some streaks. I think a little bit of streaks gives it character! I've never tried foam brushes, they may have a softer result!
  • Paint pen. I've found that the broad tips are my favorite!
  • Top Coat, if you WANT. I used it on this plate, but haven't used it on any of my others. You'll learn why I no longer use it.
Steps:
  • Remove the sticker from the back if there is one. Thoroughly wipe the plate down.
  • Paint the plate with a soft wide brush. Let dry for an hour or two, maybe longer depending on what your climate is like where you live! Add a second coat. Let dry and repeat on the back.
  • For best results, let dry over night. If you try to stencil on the letters while it's the least bit tacky (even if it feels dry to touch), your pencil will push the paint off. Not a big deal if you get it perfect the first time, but by allowing it to dry over night you can erase if need be!
  • If you chose to do a top coat, do after the paint dries. If you put the top coat over the letters that have been done with a paint pen, it will eat through the paint. Not sure why.. but yes, this did happen to me and I had to redo the letters!
  • Stencil on your letters and trace with the paint pen. I use a paper plate to blot my pen on before i use it on the plate. I've become a professional with a paint pen now, but if you are new to using one, do a couple practice strokes on a paper plate first!
  • After your letters have dried, you can add your child's art work! If you mess up, don't fret! Wipe it off quickly with a wet paper towel! When doing feet, I have discovered the easiest way to do it (with a toddler at least!) is to a have a bucket of warm soapy water nearby with a towel underneath. After you paint their foot and put it on your plate, just have them stand down in the bucket. I wasn't about to try to scrub Martha Stewart paint out of my Turkish rug! After their foot print dries, add the rest of the face to make a ghost with your paint pen. I also add my daughter's name and year to the back at the end.
  • Let dry for 24 hours.
  • Bake your plate at 325 for 20 minutes. Just keep an eye on it and make sure you aren't getting brown spots on it. That has happened to me, but I just touch it up after it's done baking with paint. No harm done!
 
Some other holiday ideas...
Thanksgiving.. same concept as Halloween.
Easter.. again, same concept. I messed up the whiskers, but my paint pen was on it's last limb.  I also free handed the eggs. I had no intentions of putting the eggs on it, but after we put her hand on it, I realized it was up way to high and there was too much blank space under the bunny.
 Christmas. A little different. I bought a square plate from Target. (Also $4.99) and didn't paint the entire plate. Instead, I painted polka dots on the trim. For the 2 bigger size circles, I used a quarter and a nickel as my stencil and free handed the little guys.
 Mother's Day. Same concept for the plate. We also tried something a little different.. an apron! As most of you know, my dearest Mother is the owner of Josie's Restaurant... so this was the perfect gift for her! I bought my apron from Michaels ($5 for one). We did the feet for the butterfly... and hands for the flowers. I free handed the bottoms of the flowers, the center of the butterfly, and the bumblebee. (Wasn't thinking... should have used my daughter's toe!) and then free handed the dots. I did not use a paint pen at all as I was afraid it would bleed through! I also washed and ironed it prior to painting. Keeping the bucket of water by the table was the perfect idea for this since we were constantly changing colors!
 Happy Crafting!

Tuesday, March 12, 2013

Bathroom Flipping!

Remember my last post about my x-ray job that I recently left and how I met my best friend in Birmingham there? Well not only is he an x-ray tech, but he flips houses here in Birmingham. He has been so inspiring and such a big help when it comes to doing little projects around the house that come with being a homeowner. I often wonder if I drive him nuts with questions on how to fix or renovate things! ha! He makes me want to redo everything in my house!

One of the projects I wanted to do was renovate my bathroom, but really didn't want to spend a fortune to do it since my friend is getting ready to completely flip our kitchen. When I told him about finding the Rust Oleum cabinet transformation kits on pinterest, he was skeptical. I told him if it didn't work out then I would replace the entire vanity... but right now, a $75 kit sounded a heck of a lot better than spending $600 on a new vanity.

First thing I did was bought the Rust Oleum laminate paint. I had read about it on pinterest and decided to give it a shot. Our countertops were white and it wasn't too bad, BUT the previous owners must have sat a hot curling iron down on the top and there were a few burn marks. Easy to hide with a decorative tissue holder, but deep down I knew they were underneath there. The laminate paint is only about $19 at Home Depot and is pretty simple to use. Just tape everything off and paint on with a foam roller. It's SUPER thick so only one coat was needed. For future when I do one of our other bathrooms, I know to just THROW AWAY THE ROLLER! The paint is thick and sticky and impossible to clean. I would rather just chalk up the $6 loss of the roller rather than deal with that mess ever again!

I left it dry for about three days before touching it.. but I did start the cabinets on the 2nd day of the paint drying. I removed all of the cabinet doors and all the hardware. The transformation kit is really easy to do, just time consuming because there are a lot of steps. First I had to wipe everything with soapy water. Then I had to do the first step of the kit- the deglosser. It totally beats having to sand! You just rub it down with a scrubby sponge and the deglosser that comes in the kit. It says to wear gloves and I RECOMMEND it!!! I used gloves, but got some on my arm and it burned my arm where it touched. After an hour of letting that dry, then I had to paint with a pure white. It took 3 coats on my cabinets even though the kit said they recommended two. I guess my cabinets were just sucking in the paint. Again, use a FOAM roller. (my personal contractor/bff recommended foam rollers for cabinets and I'm glad he did! It gives it a very smooth finish). After the paint dried, then it was on to the next step.. the decorative glaze. You paint it on, then rub it off with the cheese cloths provided and it gives it that rustic, primitive, antique look, which is ACTUALLY what I was looking for! After the glaze dries, then the last step is the top coat. It was a lot of work, but I love the results!!!

BEFORE... 


AFTER!

The after pics aren't the best cause I took them with my cell phone, but they will do for now! Such a difference!